.png)
How to make a DIY Safe Lock with Fingerprint Sensor using an Arduino
- Aziel Habtemichael
- Nov 22, 2021
- 12 min read

In this project we want to have a secure lock that opens with a registered Fingerprint image. We will have a buzzer and LED lights interacting with it. We will have two different code, one for registering a fingerprint and second for opening the Safe lock.
Materials
Arduino Uno
Fingerprint Sensor
Buzzer
LED lights (x2) - Red and Green
Servo
Breadboard
Resistors (x2) - 220 Ohm
Jumper Wires
Power Supply
Box
If you don't have any of those materials, you can buy the kit in our shop :
Software
Circuit
Our goal for this circuit is to have our fingerprint sensor sense for an image and open the lock, in this case, the servo. We also want two LED lights and a buzzer interacting with it. In the image below, we don't have the fingerprint sensor. It will be further explained later. First, we are going to set up our breadboard. We have the ground and 5V pins from the Arduino going to the negative and positive respectively. This way we can connect any ground and positive pins to the breadboard. Next, our servo. We want our servo to be our lock. The red and brown wires automatically to the positive and negative in the breadboard. The orange wire is our output pin. It's how we communicate with the Arduino. We are going to connect it to pin 9. The buzzer is pretty straightforward, we want to have the buzzer because we want to hear a sound when the lock opens. We connect its negative to the negative on the breadboard and it's positive to pin number 8 on the Arduino. The positive has a little plus sign at the top of the buzzer. Lastly, our LED lights. For the LEDs, we have their positive being connected to each of their 220-ohm resistors. Then they are being connected to pin 4 for the red one and pin 5 for the green one. And their negative pins are connected to the negative pin on the breadboard.
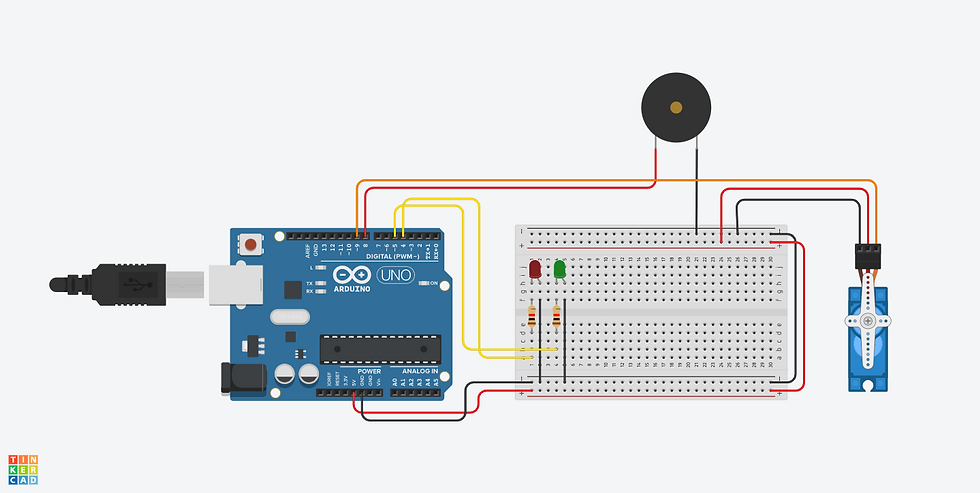
The Fingerprint module is a sensor that takes is an image, converts it, and sets it to an ID. First, you need to enroll your fingerprint then you can check if it matches. Most fingerprint modules have four pins we need to connect. The RX and TX pins are input pins where the fingerprint captures a finger's image. The RX(white wire) is connected to pin 2, and the TX(Green wire) is connected to pin 3. And the black and red wires go to the negative and positive respectively on the breadboard. Some of the fingerprint sensors have six wires. For those, you can leave the other two not connected.

Programming
We are going to have two different programs that we are going to run. But first, we need to add the Adafruit Fingerprint. To do that we have to go to the scroll-down menu at the top to sketch. Then we will find include library, then we're going to choose the first option, manage libraries. The library manager will pop up, and we're going to search up "Adafruit Fingerprint" and "Adafruit Fingerprint Sensor Library" should be as an option and we're going to install that. And that should have whatever we need for the fingerprint sensor
The first one is to enroll a fingerprint. If we want to add another fingerprint to open our lock, we should run this one. And to start us off we are going to run this one.
First, we included the fingerprint library. We are creating a new object called mySerial and declaring our sensor pins to 2 and 3. The parameters for mySerial are supposed to be the pins we connected to the Arduino. Next, we are creating the biggest object in the whole code called "finger". This is what we will be calling all the time. And we have the parameters set to mySerial. Then we are creating another variable called id. The reference uint8_t just means it's a variable with 8 bits.
Next, we have our setup. We're going to start with setting our serial monitor as it's going to be one of the most important things. The next thing is the if statement. This if statement makes sure if the fingerprint sensor is connected to Arduino. If it finds the sensor it will keep going, if not it will do nothing forever. Finally, we have a bunch of lines calling the library and matching them with our object finger. These are just important values to capture a finger's image.
We also have another function that will help us input an ID from the user and save it so that we can set it so a fingerprint image. We're asking for the user input using "Serial.parseInt()". And then we're setting it to our variable num.
Now we are going to our loop. This is what happens when the Arduino is on. We're serial printing that we're ready to take a fingerprint. We are also calling the "readnumber" function that is going to help us get an ID number for our fingerprint that we're about to set it to. Then we're calling the biggest function in this code. We are calling "getFingerprintEnroll()". We are saying repeat until we get a fingerprint image. Let's go over what the function does.
The function is located right below the main loop. So we start by serial printing that we are enrolling a fingerprint with the id we got for the main loop. And then we have a while loop that says, while p isn't equal to "FINGERPRINT _OK" keep repeating. This basically means we are going to repeat the code inside it until we have a valid fingerprint image. Inside it we are first setting it to "finger.getImage()". And then we have a bunch of switch statements. We are seeing if our variable p, which is our fingerprint image, is equal to any of the cases. For example, the first is "FINGERPRINT_OK". This is a variable that's in the library. We are checking if our fingerprint image is correctly taken or not. All the next cases are just possibilities if something goes wrong. Maybe if there are communication or image errors. It then goes to the next set of cases.
The next set of cases has something to do with the image being converted to a reasonable value for us to match with. First, we're setting our variable p to the "finger.image2Tz(1)" which is our fingerprint image to be converted. If it's a success we're going to move on to the next step until one of the problems happens. And the parameter means that this is the first time we're scanning for an image.
Now we're done with the first image scan. We're going to as our users to remove their fingers. Now we're going to do the same thing to make sure it's accurate. We're are going to capture the image and convert it again. That's why the cases are being repeated. In this case, when we're scanning the image, we set our variable p to finger.image2Tz(2). The parameter is 2 because this is our second trial. When we finish scanning the image and converting it, we have our last if-else statements. This is for storing our image as a model. We're also setting our variable p to finger.storeModel(id). The parameter is the Id we have for this particular image. And finally, it returns true.
So here we have successfully saved the fingerprint image with its particular id. So when we are going to open our safe lock, we're going to be looking for the fingerprint that this code saved. The next code is going to be about what we do with it.
#include <Adafruit_Fingerprint.h>

SoftwareSerial mySerial(2, 3);

Adafruit_Fingerprint finger = Adafruit_Fingerprint(&mySerial);

uint8_t id;

void setup()
{
  Serial.begin(9600);
  delay(100);
  Serial.println("\n\nAdafruit Fingerprint sensor enrollment");

  // set the data rate for the sensor serial port
  finger.begin(57600);

  if (finger.verifyPassword()) {
    Serial.println("Found fingerprint sensor!");
  } else {
    Serial.println("Did not find fingerprint sensor :(");
    while (1) { delay(1); }
  }

  Serial.println(F("Reading sensor parameters"));
  finger.getParameters();
  Serial.print(F("Status: 0x")); Serial.println(finger.status_reg, HEX);
  Serial.print(F("Sys ID: 0x")); Serial.println(finger.system_id, HEX);
  Serial.print(F("Capacity: ")); Serial.println(finger.capacity);
  Serial.print(F("Security level: ")); Serial.println(finger.security_level);
  Serial.print(F("Device address: ")); Serial.println(finger.device_addr, HEX);
  Serial.print(F("Packet len: ")); Serial.println(finger.packet_len);
  Serial.print(F("Baud rate: ")); Serial.println(finger.baud_rate);
}

uint8_t readnumber(void) {
  uint8_t num = 0;

  while (num == 0) {
    while (! Serial.available());
    num = Serial.parseInt();
  }
  return num;
}

void loop()                     // run over and over again
{
  Serial.println("Ready to enroll a fingerprint!");
  Serial.println("Please type in the ID # (from 1 to 127) you want to save this finger as...");
  id = readnumber();
  if (id == 0) {// ID #0 not allowed, try again!
     return;
  }
  Serial.print("Enrolling ID #");
  Serial.println(id);

  while (!  getFingerprintEnroll() );
}

uint8_t getFingerprintEnroll() {

  int p = -1;
  Serial.print("Waiting for valid finger to enroll as #"); Serial.println(id);
  while (p != FINGERPRINT_OK) {
    p = finger.getImage();
    switch (p) {
    case FINGERPRINT_OK:
      Serial.println("Image taken");
      break;
    case FINGERPRINT_NOFINGER:
      Serial.println(".");
      break;
    case FINGERPRINT_PACKETRECIEVEERR:
      Serial.println("Communication error");
      break;
    case FINGERPRINT_IMAGEFAIL:
      Serial.println("Imaging error");
      break;
    default:
      Serial.println("Unknown error");
      break;
    }
  }

  // OK success!

  p = finger.image2Tz(1);
  switch (p) {
    case FINGERPRINT_OK:
      Serial.println("Image converted");
      break;
    case FINGERPRINT_IMAGEMESS:
      Serial.println("Image too messy");
      return p;
    case FINGERPRINT_PACKETRECIEVEERR:
      Serial.println("Communication error");
      return p;
    case FINGERPRINT_FEATUREFAIL:
      Serial.println("Could not find fingerprint features");
      return p;
    case FINGERPRINT_INVALIDIMAGE:
      Serial.println("Could not find fingerprint features");
      return p;
    default:
      Serial.println("Unknown error");
      return p;
  }

  Serial.println("Remove finger");
  delay(2000);
  p = 0;
  while (p != FINGERPRINT_NOFINGER) {
    p = finger.getImage();
  }
  Serial.print("ID "); Serial.println(id);
  p = -1;
  Serial.println("Place same finger again");
  while (p != FINGERPRINT_OK) {
    p = finger.getImage();
    switch (p) {
    case FINGERPRINT_OK:
      Serial.println("Image taken");
      break;
    case FINGERPRINT_NOFINGER:
      Serial.print(".");
      break;
    case FINGERPRINT_PACKETRECIEVEERR:
      Serial.println("Communication error");
      break;
    case FINGERPRINT_IMAGEFAIL:
      Serial.println("Imaging error");
      break;
    default:
      Serial.println("Unknown error");
      break;
    }
  }

  // OK success!

  p = finger.image2Tz(2);
  switch (p) {
    case FINGERPRINT_OK:
      Serial.println("Image converted");
      break;
    case FINGERPRINT_IMAGEMESS:
      Serial.println("Image too messy");
      return p;
    case FINGERPRINT_PACKETRECIEVEERR:
      Serial.println("Communication error");
      return p;
    case FINGERPRINT_FEATUREFAIL:
      Serial.println("Could not find fingerprint features");
      return p;
    case FINGERPRINT_INVALIDIMAGE:
      Serial.println("Could not find fingerprint features");
      return p;
    default:
      Serial.println("Unknown error");
      return p;
  }

  // OK converted!
  Serial.print("Creating model for #");  Serial.println(id);

  p = finger.createModel();
  if (p == FINGERPRINT_OK) {
    Serial.println("Prints matched!");
  } else if (p == FINGERPRINT_PACKETRECIEVEERR) {
    Serial.println("Communication error");
    return p;
  } else if (p == FINGERPRINT_ENROLLMISMATCH) {
    Serial.println("Fingerprints did not match");
    return p;
  } else {
    Serial.println("Unknown error");
    return p;
  }

  Serial.print("ID "); Serial.println(id);
  p = finger.storeModel(id);
  if (p == FINGERPRINT_OK) {
    Serial.println("Stored!");
  } else if (p == FINGERPRINT_PACKETRECIEVEERR) {
    Serial.println("Communication error");
    return p;
  } else if (p == FINGERPRINT_BADLOCATION) {
    Serial.println("Could not store in that location");
    return p;
  } else if (p == FINGERPRINT_FLASHERR) {
    Serial.println("Error writing to flash");
    return p;
  } else {
    Serial.println("Unknown error");
    return p;
  }

  return true;
}
Now, this is our code for the safe lock. This is code that we'll see if the fingerprint matches and open it if it does.
So we start by including both the fingerprint and servo libraries. Then we create a servo object called servo. Next, we created a variable for a servo pin which we set to 9, we created an array for our buzzer for the tone and we created another variable for how long the sound should be played. Then we set our fingerprint pins to 2 and 3 because that's where we plugged them in. And we finally are creating the biggest object in this code called "finger" that has the parameters of the pins from the previous line of code.
Now let's move on to the setup. First, we're starting by setting up our serial monitor, servo, and fingerprint sensor. We're setting our servo to position 0, which is what we want to start with. Then we're setting up our fingerprint sensor with that if statement. If it finds the sensor it will continue to the program but if it doesn't it will do nothing forever. Then we're going to count how many fingerprints were saved and we are going to wait for a valid finger.
Now we're going to move on to the loop. The loop is where everything happens. We're calling the main function that will do everything for us. We also have a little bit of delay. Let's go and see what the function does.
The "openSafeLock()" function is found at the bottom. So first we're setting p to our finger's image. Then to check if our finger is valid we're running three if statements. The first one captures our finger's image. The second one is converting our finger's image.
And the third is checking if it has a fingerprint that matches. If they are not ok it returns -1, meaning it won't do anything. And it proceeds if everything is ok. If you want to know more about those three functions, look at the earlier code. Now we're proceeding to what we do if we have a matching fingerprint.
First, we're going to serial print that we found a fingerprint, and then we're going to print by how much confidence it was found. This just means how accurate it was found. After setting the servo pin to 9, we're turning our green light, setting the servo position to 90 to open the lock, and turning on the buzzer using the sound array. Then we have a delay of three seconds for the user to open the lock. After three seconds the user should've opened the lock. Then we're are setting the servo position back to 0 and turning the red LED light on indicating that it's closed. The user should use their fingerprint to open the lock and also use their fingerprint to close the lock.
#include <Adafruit_Fingerprint.h>
#include <Servo.h>

Servo servo;

const int servoPin = 9;
int sound[] = {300, 400};
const int duration = 500;  // 500 miliseconds

SoftwareSerial mySerial(2, 3);
// Setting our Fingerprint ports to 2 and 3

Adafruit_Fingerprint finger = Adafruit_Fingerprint(&mySerial);
// Our main object

void setup()
{
  Serial.begin(9600);
  delay(100);
  Serial.println("\n\nAdafruit finger detect test");
  servo.write(0);
  delay(100);
  servo.detach();
  finger.begin(57600);

  if (finger.verifyPassword()) {
    Serial.println("Found fingerprint sensor!");
  } else {
    Serial.println("Did not find fingerprint sensor :(");
    while (1) { delay(1); }   // If fingerprint sensor is not found, it's not going to do anything forever
  }

  finger.getTemplateCount();
  Serial.print("Sensor contains "); Serial.print(finger.templateCount); Serial.println(" templates");
  Serial.println("Waiting for valid finger...");
}

void loop()                     // run over and over again
{
  openSafeLock();
  delay(50);            //don't ned to run this at full speed.
}

uint8_t getFingerprintID() {
// This function gets our image we put in our Fingerprint Sensor
  uint8_t p = finger.getImage();
  switch (p) {
    case FINGERPRINT_OK:
      Serial.println("Image taken");
      break;
    case FINGERPRINT_NOFINGER:
      Serial.println("No finger detected");
      return p;
    case FINGERPRINT_PACKETRECIEVEERR:
      Serial.println("Communication error");
      return p;
    case FINGERPRINT_IMAGEFAIL:
      Serial.println("Imaging error");
      return p;
    default:
      Serial.println("Unknown error");
      return p;
  }

  // OK success!

  p = finger.image2Tz();
  switch (p) {                                  // This method converts our image taken to a reasonable value
    case FINGERPRINT_OK:
      Serial.println("Image converted");
      break;
    case FINGERPRINT_IMAGEMESS:
      Serial.println("Image too messy");
      return p;
    case FINGERPRINT_PACKETRECIEVEERR:
      Serial.println("Communication error");
      return p;
    case FINGERPRINT_FEATUREFAIL:
      Serial.println("Could not find fingerprint features");
      return p;
    case FINGERPRINT_INVALIDIMAGE:
      Serial.println("Could not find fingerprint features");
      return p;
    default:
      Serial.println("Unknown error");
      return p;
  }

  // OK converted!
  p = finger.fingerFastSearch();
  if (p == FINGERPRINT_OK) {                            // This method searches our fingerprint through the fingerprints that are saved
    Serial.println("Found a print match!");
  } else if (p == FINGERPRINT_PACKETRECIEVEERR) {
    Serial.println("Communication error");
    return p;
  } else if (p == FINGERPRINT_NOTFOUND) {
    Serial.println("Did not find a match");
    return p;
  } else {
    Serial.println("Unknown error");
    return p;
  }

  // found a match!
  Serial.print("Found ID #"); Serial.print(finger.fingerID);
  Serial.print(" with confidence of "); Serial.println(finger.confidence);

  return finger.fingerID;
}

// returns -1 if failed, otherwise returns ID #
int openSafeLock() {                                         // This method runs the whole code where if a fingerprint is matched our safelock opens
  uint8_t p = finger.getImage();
  if (p != FINGERPRINT_OK)  return -1;

  p = finger.image2Tz();
  if (p != FINGERPRINT_OK)  return -1;

  p = finger.fingerFastSearch();
  if (p != FINGERPRINT_OK)  return -1;

  // found a match!
  Serial.print("Found ID #"); Serial.print(finger.fingerID);
  Serial.print(" with confidence of ");
  Serial.println(finger.confidence);
  servo.attach(servoPin);
  delay(1);
  digitalWrite(4, LOW);
  digitalWrite(5, HIGH);
  servo.write(90);
  tone(8, sound[0]);
  delay(duration);
  tone(8, sound[1]);
  delay(duration);
  delay(3000);
  digitalWrite(4, HIGH);
  digitalWrite(5, LOW);
  servo.write(0);
  return finger.fingerID;
}
After finishing writing the code, download it using the USB cable to the Arduino. Before that, you have to make sure the board type is the right one and it's set up to the right port. To do that go to the tools section choose the board type and port. In this case, we are using an Arduino Uno. Finally, connect the cable and see what happens.
Building
So the first thing we want to do is to find any type of box. We can use any kind of box. We're not so much worried about how secure it is. We need to find a box that is easy to cut and edit.
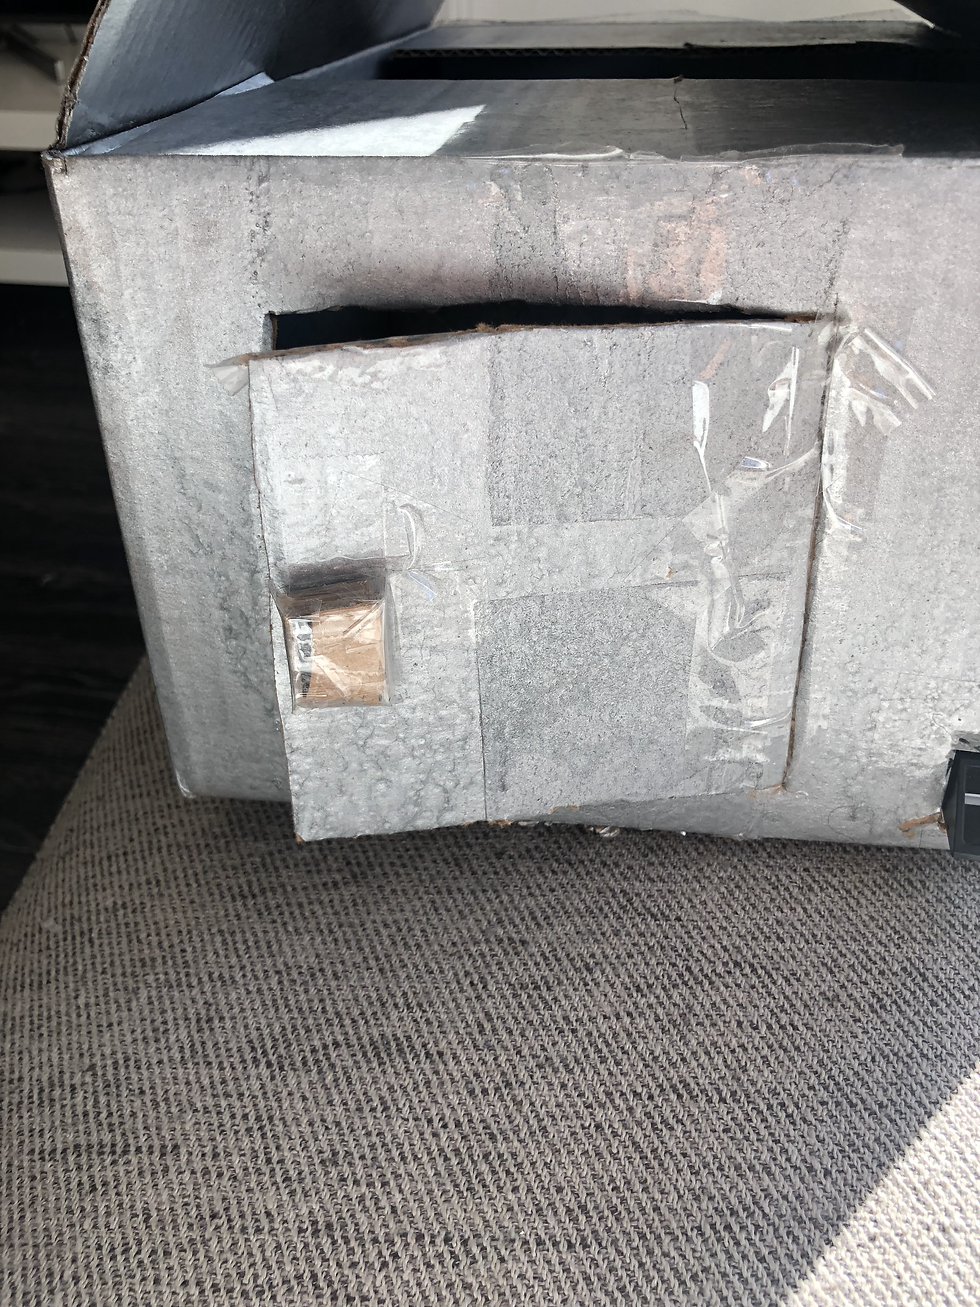
First, we need to cut a square on the front of the box. Then we're going to tape one side of it to the rest of the box.
For the handle, we're going to stack 3 or 4 small pieces and tape them together. It should look like a square. Then we're going to tape that to the door.
Try opening and closing it to make sure it's efficient and works.
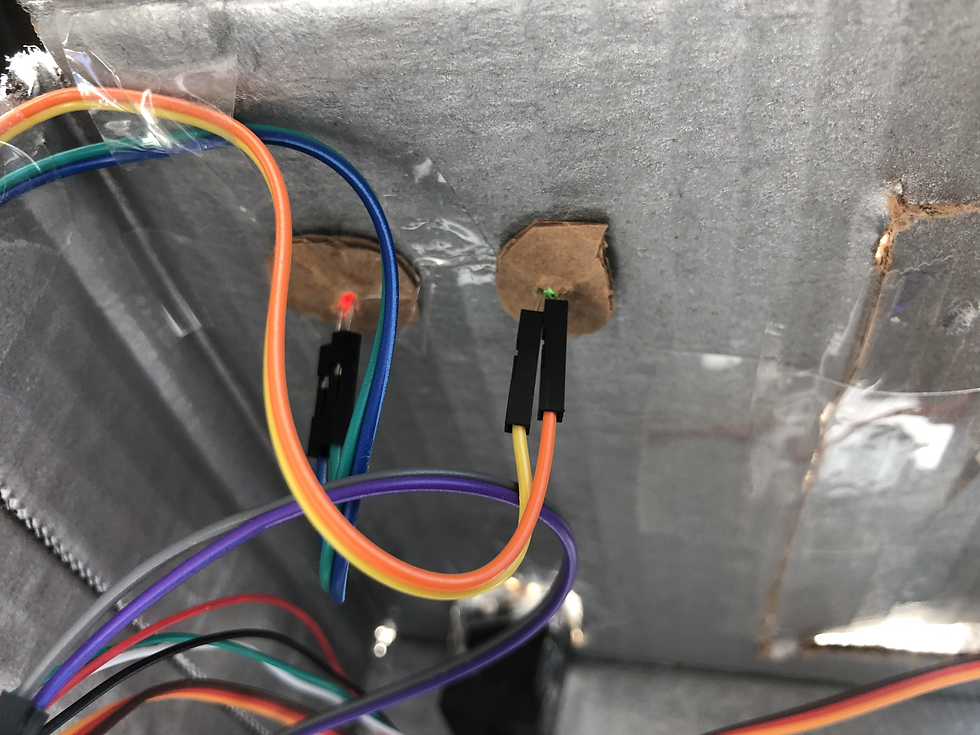
This is how we're going to set up our LED lights. We're going to cut out two holes for the two of them .
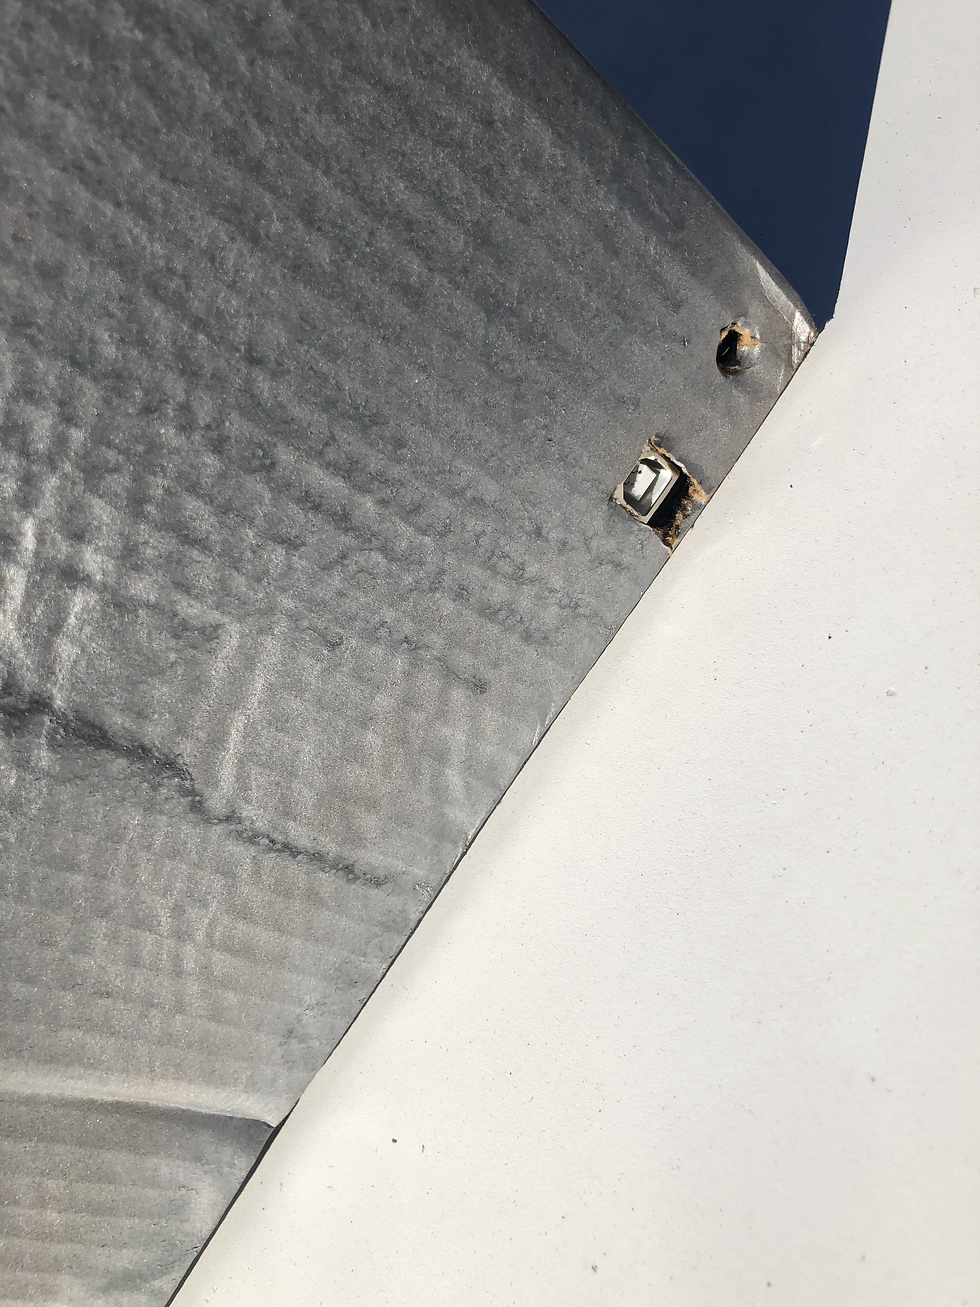
And for the fingerprint sensor, we're going to cut our a square and fit it in. Make sure only half of it is shown, just enough for the user to put his finger on it.
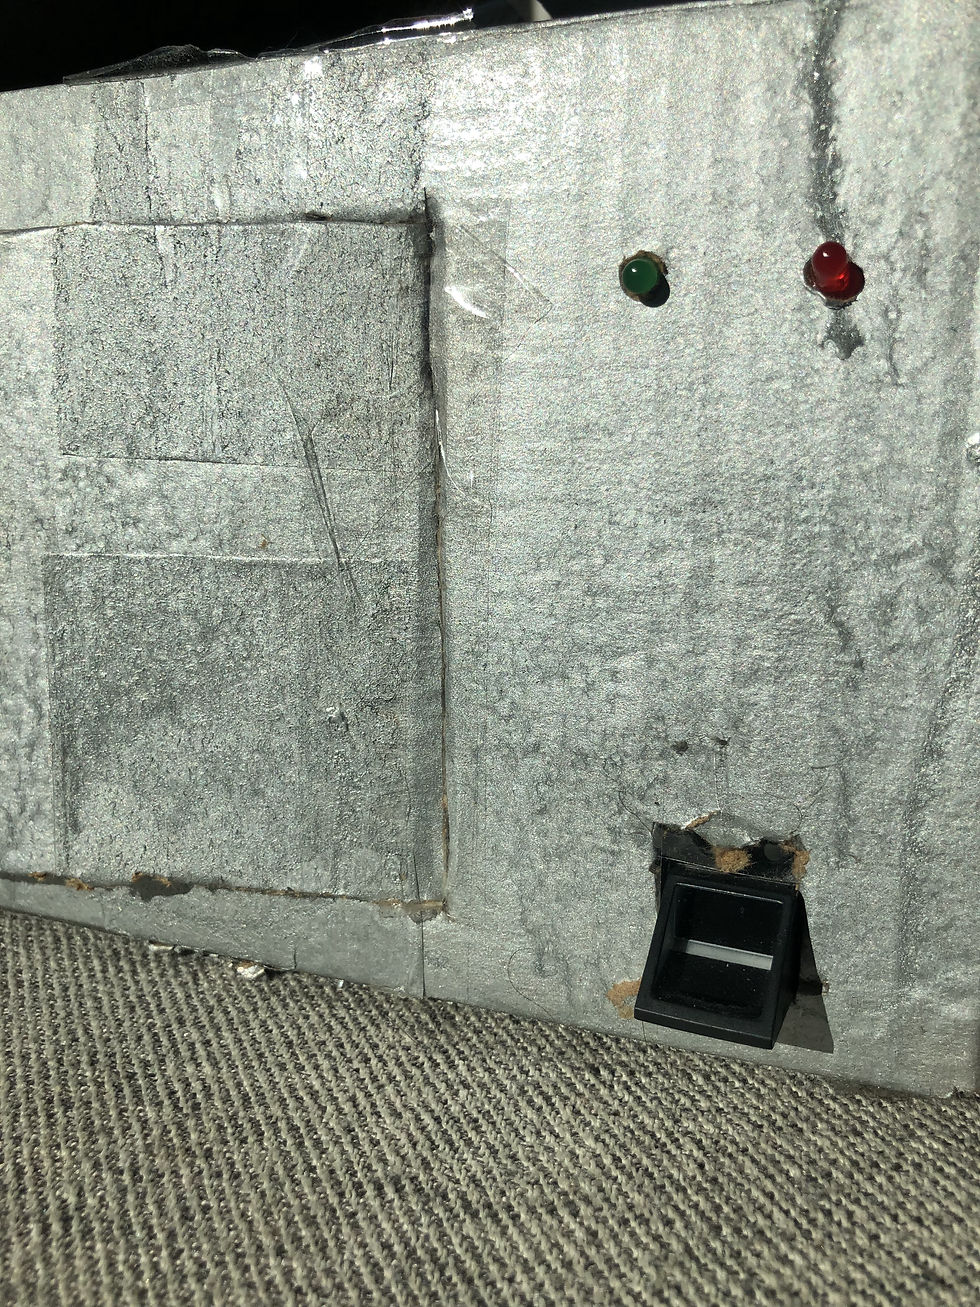
This is what the user should see from the front.
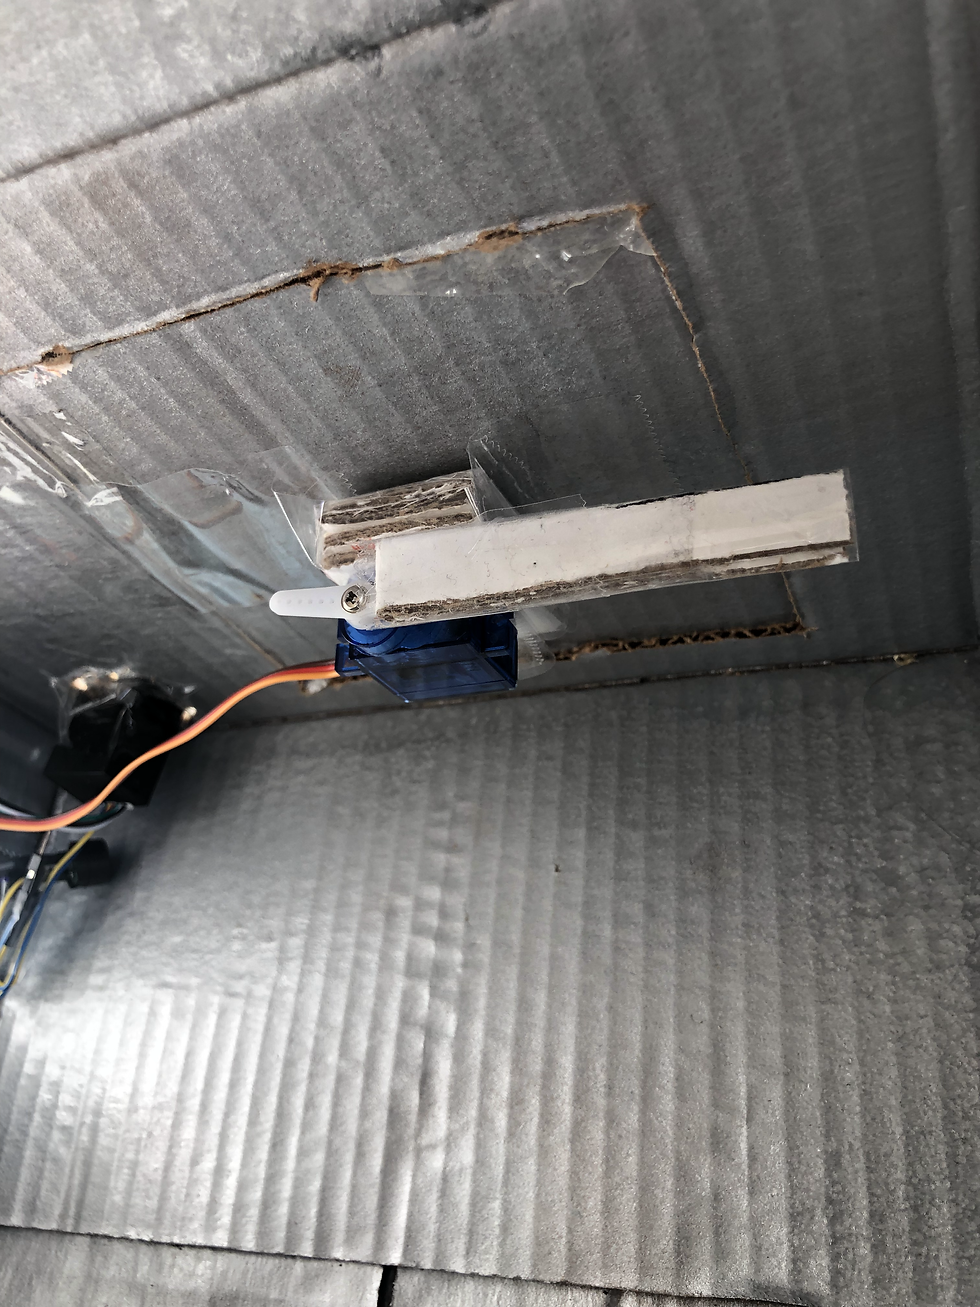
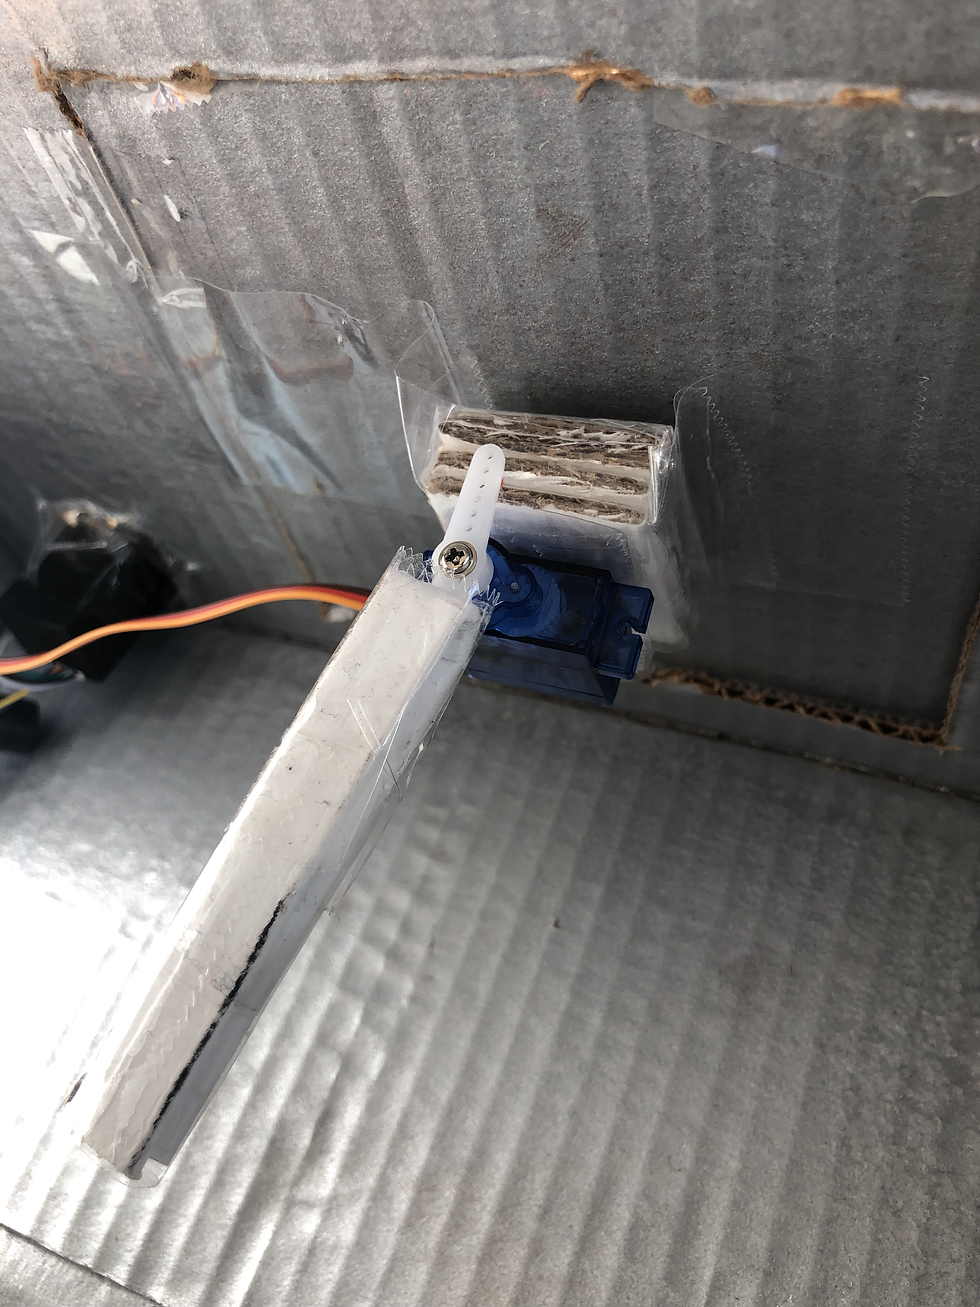
This is what our lock looks like. We have the same cardboard stacked cube that we used for the door handle. Then we're going to attach our servo to it, which will give us some room to open and close. Then we're going to attach another long cardboard to it. The second photo, that's what I should look like when it's open.

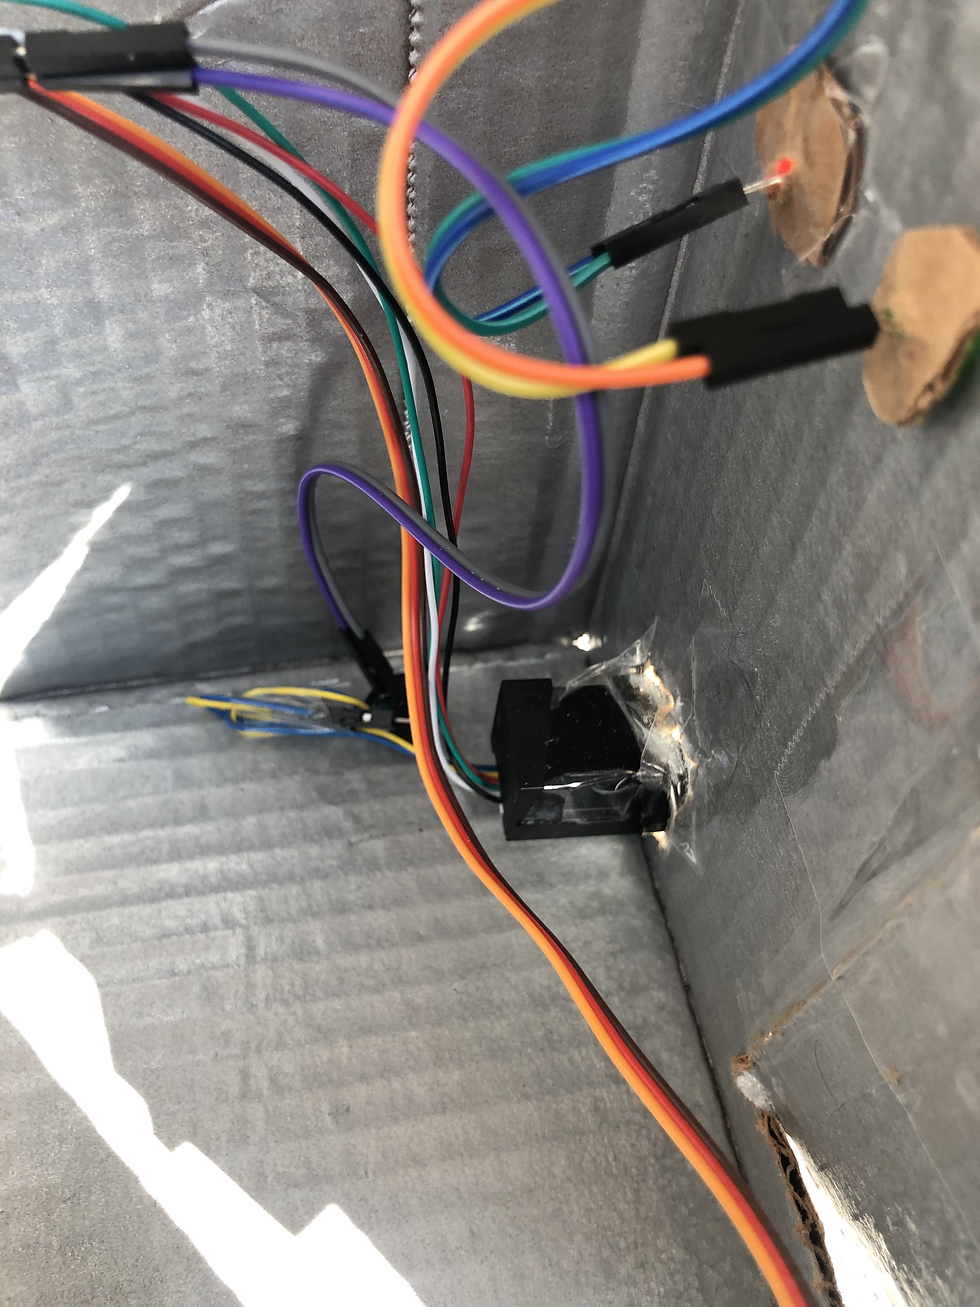
We're going to organize our wires this way. All the wires that come from the LED lights, Fingerprint sensor, buzzer, and servo, are going to be taped together. And tape them to the side. We want to make sure the user doesn't see them.
Where going to split it up with another piece of cardboard to hide the Arduino and breadboard.
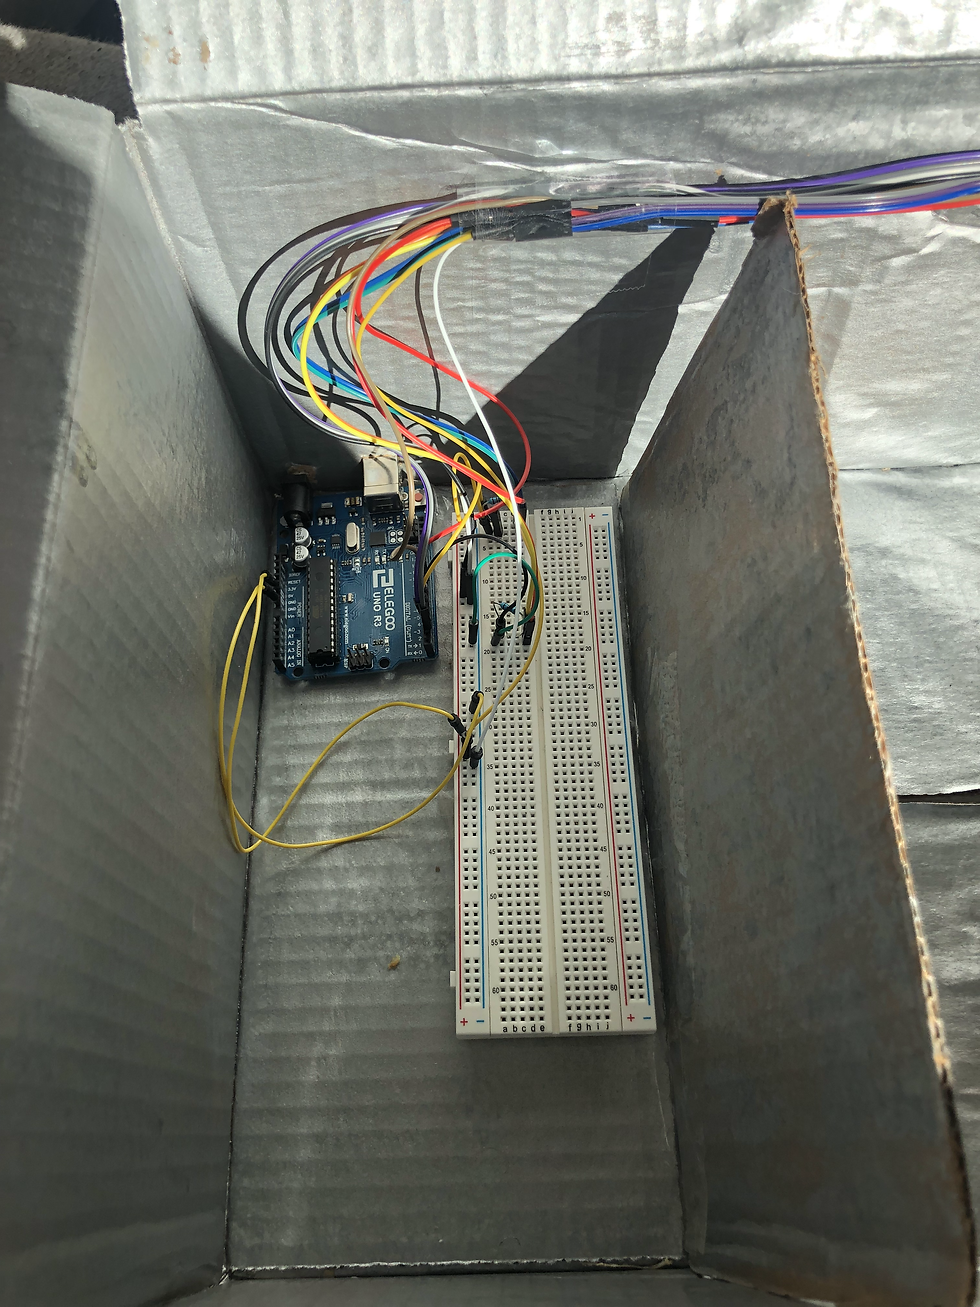
Then here is our system. This is where we put our Arduino and breadboard. We're going to tape them onto the box to keep them steady.
You might need extra wires if your box is really big. Here we used female to female wires so we can extend it.
As you can see here, we're going to cut out some parts of the box to download our program to the Arduino. We can also plug-in power to turn it on. Unless we have a battery that has a switch, we can't use a battery. We would have to unplug it to turn it off, so it doesn't make sense.
Finished Product
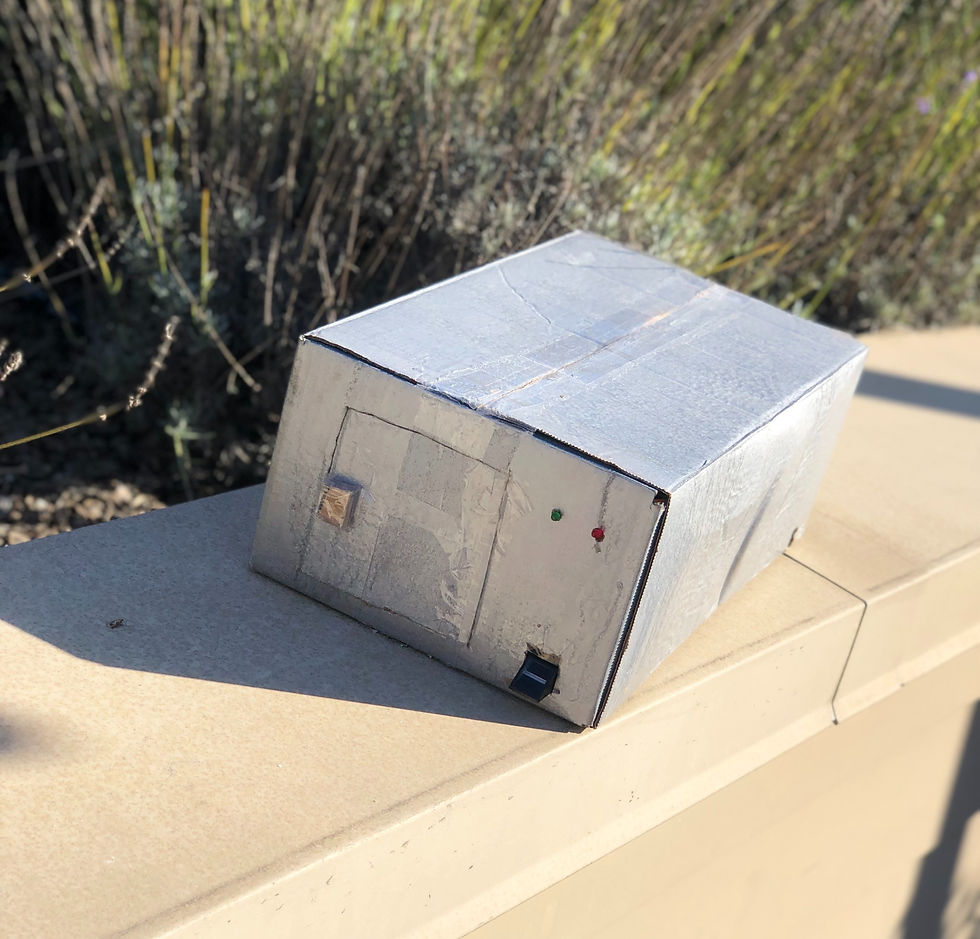


Our main goal was to create a prototype of a fingerprint-safe lock. We didn't care about how safe it was. Of course, anyone could cut the cardboard and see what was inside it. But our main goal was to create a prototype. We were able to capture a fingerprint image and convert it, we were able to open the lock based on the fingerprint, we were able to come up with designs for the lock and we were able to successfully make a Fingerprint Safe Lock. Feel free to change anything that suits you.
Make sure to like the post
Comment down below if it worked for you, any problems you're running into, and what other projects you want me to keep doing!

Comments